Popular Post

Metal Painting

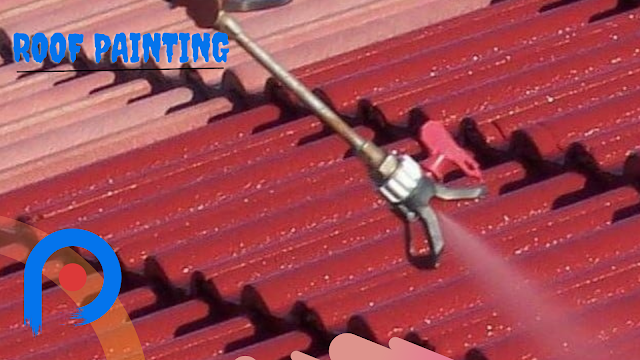
In this article let us together learn how to paint METAL surfaces like Roof Painting and other metal painting. 


We are a strong advocate of clean and healthy preparation of the paint surface before painting. Proper preparation not only saves resources to the owner but it does ensure the longevity of the surfaces (metal or wood) and the topcoats. Cleaning and applying the right primer does make a lot of difference. Even premium metal primer and paint tend to lose their sheen (Learn Sheen) if proper surface preparation is not accorded. So do clean and prepare thoroughly before you put your hands on the brush and the rollers. Here we have a few ways to paint any metal surface:

Clean Metal surface: The metal surface should be free from dirt, grease, old paint and rust.  Remove all of them with the help of sandpaper, pressure wash if possible, or some mineral spirits. Cleaning with detergent water could also help wash some dirt.

Peel off loose or peeling paint: Old paint that is loose and peeling off should be removed completely. One can use hand wire brushing, scraping, and sanding (Learn Sanding) techniques for removing old paint. While sanding with a power tool may be faster, they could polish the metal surface abrasively giving adhesion problems.

Remove Rust: Rust is one major issue in metal painting. It affects the adhesion of the paint. So it is very much important to remove the rust deposit before applying the paint. Sparse rust on the metal can be cleaned by brushing and sanding. Using a premium primer on rust affected metal surfaces could bear better results. Painting on a rusted surface will damage both the surfaces and the paint applied.

Repair holes and dents: After removing rust, if there are holes and dents on the roof or surface, fix them to the shape and fill them up with appropriate fillers or sealants. Check with the hardware or paint shop for the sealant options.  

Right Primer: As endorsed in our previous post, priming (Learn Priming )is one of the most important parts of the painting. Water-based primers don’t go good on metal surfaces. The primer available in our market that prevents rust is Iron Oxide.  Check for other options that help averts rusting with the shopkeeper. Apply the primer immediately after surface preparation. This help to keep away flash rusting (corrosion of wet iron) and accumulation of dust on the surface.

Whether you are painting the metal roof, gate or door, the painting process and taking precaution remains the same. Clean the surface properly of any dust or grease, take out any loose or peeling paint, and discard rust. As soon as cleaning and preparation are done, apply a primer coat. Consider enough drying time before applying paint. It's safer to refer to the product description for better results as drying time varies with paint brands.  

Painting in Cold & Hot weather

Winter does no good for the construction industry generally. It is because cement and paint adhesion doesn’t go well with the cold. However, if the average temperature is read in between 15-29’ Celcius, it is good to do outside painting.

Idle temperatures for latex and oil-based paints are between 10-21 and 10-32 degrees Celcius respectively. Heat and cold temperatures are less of a concern in Bhutan.  Painting can go around the year except for some days.   Know these;

Heat & Paint

Very high and low temperature affects the adhesion of the paint resulting in peeling or cracking of the paints. Painting at a very temperature can cause bubbles and blisters. It is recommended not to paint latex that goes good on the exterior at a temperature above 32’ Celcius.  

Cold & Paint  

Avoid painting when the temperature is below 10’ Celcius. It is hard to cure paint in cold weather which affects the overall life of the paint.

Oil-based paints thicken in cold weather, causing paintbrushes to harden. This leads to thicker paint application and less coverage. Since paint takes a long time to dry in cooler temperatures, the painted surface stays wet for a long time, attracting dirt on the paint.

Humidity & Paint 

Humidity/moisture is another issue for the paint to adhere to surfaces causing the paint to bubble and eventually peel.

Sun & Rain

Avoid painting in direct sunlight, rather follow the sun’s shadow around the house. It’s a good rule of thumb to allow the paint to be dry to the touch before the sun goes down for the day.

No matter what the temperature outside is, painting is never a work when it’s raining. Enough dry time is magic for better results.


Paint Priming


What is a paint primer?

Paint primer also known as an undercoat is painted onto the surface before the topcoat. It provides strong adhesion for the surface and the paint. The primer in between provides paint durability and surface protection. The primer also blocks the smell or stain coming out of surfaces.

How is primer different from paint?

The basic difference between primers and paints is the chemical nomenclature. The primer contains resins providing bonding between paint and the surface while paint contains pigment to colour.

What types of primer are there?

Oil-based primer

Oil-based primers are handy for they work well with both latex and oil paints. It can be applied on many different surfaces. It is common for wood surfaces because of its best ability to seal the porous surface of the wood and provide a better surface to paint.

Oil-based primer goes good on metal materials. It prevents stains from appearing through the new paint on the material. Oil-based primers also prevent or slow down paint peeling blistering and cracking.

Their drawbacks are that it takes a long time to dry and releases a lot of harmful chemicals in the form of volatile organic compounds (VOCs) in long run.

Shellac Primer

This primer is comparatively less handy than the oil-based. They work well to seal in odours and smell from stained surfaces.  Any surface that requires sealing of smell or stain can be effectively done by using a shellac primer. It works on wood, plaster, plastic and metal.

Shellac primer is much quicker to dry than oil-based because they don’t penetrate the wood surface deeply. Due to their ability to soften under high temperatures, they can only be applied to certain areas on the surface in small patches, also known as “spot-priming”.

Latex-based Primer

Latex-based primers are water-based and are common for priming unfinished drywalls.  It is flexible and quick to dry. Latex-based primers also perform well with soft-wood, galvanized metal and concrete.

Unlike oil-based and shellac primers, latex-based primers don’t prevent the appearance and sealing of stained surfaces as effectively as the other two.  Since they come as low VOC primers, it makes them a healthier and safer choice to deal with.

When do we need a primer?

While priming may seem a waste of money, the prospect it brings up in the post painting is undeniable. So know when to prime your surface;

Changing the shade of the wall: It is difficult to change darker wall colours to a lighter tone. Priming will ease the changeover.

Painting latex-based paint over an oil-based: Primer will help you gain a better adhesion between the two different paint based chemicals.

Painting over metal or plastic: Painting over metal or plastic surfaces is frustrating. A primer will provide a strong base for the paint and also protect against rust.

Painting a new wall: New drywall and wood will need priming before painting. Wood is very porous and will absorb more topcoats if a primer is not applied.

Unattractive wall: Stains and damaged walls can be covered both in appearance and smell by primers.

You don’t prime when:

The walls are in good condition without any significant stains or damage.

The new paint matches the old Paint colour

How long does primer need to dry?

Most primers will need a minimum of 30 minutes to an hour to dry before another coat can be applied on top. However, you should not begin the second coat until the primer has completely dried. So, the crux here for professional results is to wait for the primer to dry thoroughly.

How many coats of primer should you do?

Primers don’t always cover the surface completely. Two coats of primer may be needed when changing from one colour to another. It is a good idea to tint the primer to the colour of the new paint.

Normal for any drywall one coat of primer is enough for better paint results. 

How to get rid of the paint smell

I found very nice information worth the share here on how to get rid of the paint smell. We have condensed to a few points which implementing is easier and possible.

We have not tried or tested ourselves but trusted the content from a reliable website.

********Cut a Few Onion Halve******

Onions naturally release high levels of sulfur, which is a compound known to neutralize paint smells. Slice a few onions place them around your room for a couple of hours. Once you’re done eliminating paint fumes, put your onions straight in the bin.

********Baking Soda to Remove Paint Odors*********

Baking soda, also called sodium bicarbonate, has abrasive qualities that catch fumes to get rid of paint smells. Pour a few inches of baking soda into a few bowls, and lay them near your paint walls. Alternatively, you can spread your powder onto baking sheets.

********Fill a Bucket of Water*********

This simple trick effectively absorbs paint solvent vapours and removes its foul odour. Do so by filling up a three-gallon bucket with water, lemon slices, and a tablespoon of salt. Proceed to leave your bucket in your room’s centre overnight. By the morning, the paint fumes should have significantly dissipated.

Helpful Tips

*********Opt for Low VOC paints********

If you want to keep paint fumes to a minimum, purchase paints with zero or low Volatile Organic Compound amounts.

********Turn off Your Air-Conditioning Unit and Close Air Vents*****

Ensure your AC and air vents in rooms adjacent to your paint job are turned off and shut during your paint job.

*********Paint in Cooler Temperatures*********

High humidity causes paint to dry slower, gradually emitting a foul odour. Do a painting project on cooler days or make sure to dry your rooms quickly with a fan.

************Close Paint Can Lids****************

Be sure to seal the paint lid on the job site and store paint cans in a cool, and dry place.

*******Wait for Paint Layers to Fully Dry before Reapplication******

Wet paint emits strong odours and typically needs several hours to dry. Allowing your paint layers enough time to dry will reduce fumes and stench emitted.

*********Ensure your Room is Well-Ventilated*********

During your paint job, facilitate good airflow throughout the room by opening your windows and turning on a few fans. As a result, paint fumes will dissipate faster, and your paint will dry quicker.


Sanding in Painting

Sanding in painting is a process of preparing surfaces removing the imperfection by rubbing sandpaper making it smoother for the surface to absorb paint properly. It is also used to roughen surfaces too glossy for paint or filling compound to adhere easily. 

Sanding is often a crucial step for ensuring that your surface is ready for painting. One does not have to be #pro to sand, sanding to smoothen or roughen surfaces would do the magic. While sanding is not required for every painting project, rough spots on walls, whether they have been previously painted or not, need to be sanded before they are painted to ensure the paint goes on smoothly. Sanding is a must for repainting previously surfaces painted with gloss or high-gloss paints. 

Sanding in between coats of paint on any surface removes imperfections caused by the roller, dust or anything that may have stuck to the wall after it was applied. It also lightens the overall paint sheen making the area brighter.

How to sand? Well, we are giving you here a simple tested logic of sanding. If it's for wood scribble a light pencil line across wood before you start. Once the line is gone, as to your need move up to the next grit and repeat. And for the cement walls, if you could, pressure wash the wall before sanding. By sanding the cement surface, you are doing it to remove all the loose sand gravels that may affect the painting results.

Sandpapers that we found in our market are commonly graded as coarse (40 to 60 grit), Medium (80 to 120), Fine (150 to 180), Very Fine (220 to 240), Extra Fine (280 to 320) and Super Fine (360 and above). Sanding with progressively finer grits removes the scratches left by the previous paper and eventually leaves a smooth finish. So greater the grit numbers, the finner the finish and look.

Pic-Internet

Cleaning after sanding is bet painters do not ignore. The most effective way to clean wood after sanding is to brush off all the dust and then wipe the surface with a rag and in some cases use mineral spirits. The mineral spirits clean any stain or grease off of the surface making it ready for painting. For the cement wall, use dry and wet rags in turn to clean. 

Paint Sheen

Pic-Internet 

Different types of paint

It's hard to physically examine the paint types from just seeing the colours painted on the houses unless we get to local paint stores or someone explains it. We have penned the four basic paint sheens and their understanding for you. While there are plenty of paint and sheen types to choose from, we have constricted broadly to a few.

Latex paint is water-based and has some great advantages like easy do it yourself (DIY) application, simple and easy cleanup, fast drying time, odour low and durability. Latex paint is idle for Bathrooms, Kitchens and other moisture surfaces since it resists yellowing and mildew better than oil-based paint.

Acrylic paint is paint that goes on any surface and dries quickly. The paint can be diluted with water although it can become water-resistant after it dries out. It is the right paint in case you work quickly. It is odourless and non-toxic as well. However, the quick drying time makes it hard to achieve a smooth blend.

Oil paints are more durable with abrasion-resistant than latex paint. They also have a slightly higher gloss(shine). Limitations of these paints are stronger odour, take longer time to dry, and require a solvent such as paint thinner for cleanup.

Type of Sheen?

Paint sheen means the level of shininess in paint. Today, most paints come in one of the following sheens: flat, satin (or eggshell), semi-gloss, and gloss.

Flat paint has the lowest paint sheen available and when dry, is completely non-reflective with a matte finish. Flat paints are great because they make faulty surfaces appear uniform. It is recommended for drywall or surface that is not properly sanded. The porous texture of the sheen helps the paint holds dirt, making cleaning more difficult.

Eggshell or Satin paint is low-lustre paint but better than flat paint. The slight paint sheen is what makes eggshell and satin finish able to bring a warm look and feel, and a certain depth to a room. Also, it is much easier to clean than flat and can be used on any wall in your home.

Semi-gloss paint has more lustre. If choosing semi-gloss paint, selecting 100% acrylic latex is a good choice that has the highest quality. This paint sheen is commonly used but not in Bhutan for children's rooms, kitchens and bathrooms because of the durability of the paint, damage-resistant, and easy to clean. Semigloss paint shows a lot of imperfections, so due considerations are necessary if you have imperfect walls and young children.

Gloss paint is the toughest, most durable and the shiniest of all house paints. It is often used for doors and in areas susceptible to getting dirty. It is mostly used to coat baseboards, mouldings, door frames, and exterior trim. Intense preparation to smoothen all surfaces is essential before starting to paint gloss.

Proper study and consultation of the paint would ease work, protect property in long run, and of course, help in the costing. 

Masking in Painting

In today’s post, we bring to you the concept of MASKING in painting work. Not a prevalent practice in the Bhutanese painting market, the understanding of proper painting methods and their future implication are least considered but the cost is put first and fast. Keeping these entire aside, we hope this information help in one way or other at some point in time.    


Masking
Masking   Pic-Internet

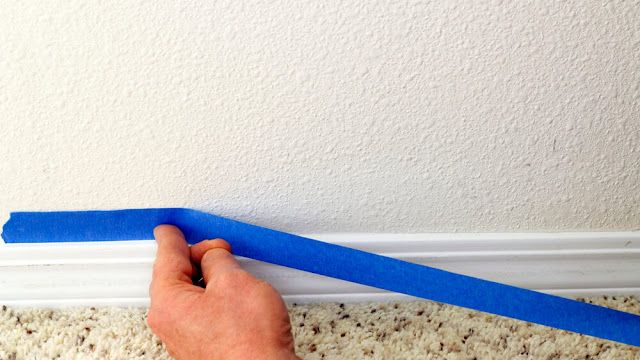
Well, masking in painting refers to a process where masking tape is covered on certain areas which are not intended for painting. Painting is a messy job; paint gets onto anything that’s not covered. So masking as a preparation before painting is a primary task that attributes to proper finishing, maintaining an accurate line of colours, and ease post painting like cleaning and minimising resource spending.

Though the masking benefits are abundantly but somehow inapplicable in our market, we have narrowed the understanding that is doable as follows;

1.     It takes far more time to clean up paint that ends up where it doesn’t belong than it takes to prevent the paint from getting there in the first place. Masking reduces clean up time. For ex. as in the picture, masking off windows with tape and plastic (used newspaper in our case) protects them from paint spatter. This saves time from scraping up paint dots on the glass.

  1. Proper masking speeds work. So long masking tape is done firmly, paint bleeding is a minor issue compared to trying to paint along with trim without getting spots of paint in the wrong place.
  2. Masking allows you to paint on correct alignment without worrying much about the opposite side. Only those who tried the art of perfection know how difficult that is to maintain proper paint lines without masking.
  3. Masking enables a painter to look like a pro. They need not have to master fantastic cutting-in skills. Using tape keep lines straight and the paint where it belongs.
  4. Masking help maintain visual appeal as it was. Covering door hinges & knobs and other hard-to-remove hardware with masking tape or small plastic retains its originality. It not only irks the property owner but is amateur of the painting firm painting door knobs and hinges.  
  5. Using drop cloths across the floor or wherever relevant as masking ensures that floor surfaces are protected from paint drips.

When masking is not taken care of, the post painting becomes laborious and cost implications are obvious. Masking is a critical part of the painting preparations and worth effort for many reasons. The techniques for masking are the same for indoors or out, cover properly parts that are not intended to paint. Bam then do the brush stroking, roll the rollers or spraying that we use.

Note: You can remove hardware that is easy to replace, keep them in a separate plastic bag and put it back. Paint shields can be an option in larger area masking scenarios. Remove the MASKING when the paint is sticky but not entirely dry.

Know the House Painting process!

Painting the walls of any structure is a must-to-do on time activity. Not only does painting give a fresh look, but it also helps maintain the walls and bring the maintenance cost down.

Through this post, we intend to provide some basic processes of painting and other factors involved in the cost estimation of property painting for contractors and DIY individuals. Because of the complexity in the paintings, property owners tend to make errors of judgment in selecting types of paint, application method and budgeting.

What is the surface that is being painted?  The answer to this is infinite, we can paint anything. In the pretext of this article, we will cover House Wall Paintings. The general thumb rule is “the cost of exterior paint is lesser than interior paint.” However, the process of exterior painting is cumbersome as it needs the use of scaffolding or a ladder pulley system.

Conversely to the prevailing practices in Bhutan, sensibly it augments that more coats of paint and an extensive sanding/levelling process are required for exteriors to protect from external weather. This is the reason today the exterior walls of all the buildings in Bhutan is an eyesore. Following are the factors that contribute to planning the painting.    

Wall condition:

The condition of the walls is the most important factor that plays the cost. Fresh painting needs 1-2 coats of putty & primer, and at least 2-3 coats of topcoat paint. For the repaint, touch-up of putty in parts are recommended and primer with 1-2 coats of paint.

Generally, a layer of putty is applied before painting to ensure that the wall gets a smooth and even finish once painted. It also increases the lifespan of the paint.

Consider employing good men to do the plastering. A well-punned wall enhances the painting's outlook. The undulated wall elevates the overall process resulting price hike.

Fresh painting costs more than repainting. On the contrary, if the repainting surface is not clean (like in institutional buildings use of tapes are extensive), cleaning and preparation need a lot of work resulting again in cost escalation.  

Paint type:

Another important factor that put weight on the cost of painting is the paint type in use. The price difference for different kinds of paints is clear. Water-based distemper paints are the cheapest paint we have in town.   They are the least durable with a strong odour.

Emulsion paints come in both water and oil-based; they are the standard quality for painting today. They are durable and often washable as well; some of these paints also have anti-fungal/mildew properties.

Emulsion paint comes in a wide range depending on the different finishes such as matte, glossy, satin, pearl, and more. Check with local distributors.  

The number of colours used:

Using single colour or lesser throughout the project is invariably cheaper than using multiple colours. This is simply because of economies of scale. Wastage of paints is also more. The more colours in use, extra work is added and thus the increment in the cost of painting.

Cost of Labor:

Labour charges are very tricky. Call the contractors to the site for inspection of the property. Have your rate ready and consider relating the contractor’s quote. Analyze the differences and the reasoning before agreeing on the rate.

Prices vary depending on location, the quality of paint used, and the project's size and difficulty. The level of painting skills of the firm would help determine the cost and their work output. The well-established firms usually charge more than the part-time contractors.

The important aspect here is to find the right contractor with the required skills and mechanization process adapted to do the job. So opting for organized players is a safer bet.

 Ask these questions to the firm you are going to hire:

ü  How long have you been painting?

ü  Will you be using subcontractors?

ü  How many painting jobs have you completed in the last year?

ü  Can I have a list of references with contact information?

ü  What paints do you recommend?

ü  If you get paint on the furniture, are you liable?

ü  Do you offer a warranty or guarantee your work?

Featured Post

Buli Tsho

I am sorry it won’t be sensible unless you understand Khengkha. I have requested the caretaker do in Dzongkha, but he felt Khengkha would be...