Popular Post

Showing posts with label Paint Sprayer. Show all posts

Sanding in Painting

Sanding in painting is a process of preparing surfaces removing the imperfection by rubbing sandpaper making it smoother for the surface to absorb paint properly. It is also used to roughen surfaces too glossy for paint or filling compound to adhere easily. 

Sanding is often a crucial step for ensuring that your surface is ready for painting. One does not have to be #pro to sand, sanding to smoothen or roughen surfaces would do the magic. While sanding is not required for every painting project, rough spots on walls, whether they have been previously painted or not, need to be sanded before they are painted to ensure the paint goes on smoothly. Sanding is a must for repainting previously surfaces painted with gloss or high-gloss paints. 

Sanding in between coats of paint on any surface removes imperfections caused by the roller, dust or anything that may have stuck to the wall after it was applied. It also lightens the overall paint sheen making the area brighter.

How to sand? Well, we are giving you here a simple tested logic of sanding. If it's for wood scribble a light pencil line across wood before you start. Once the line is gone, as to your need move up to the next grit and repeat. And for the cement walls, if you could, pressure wash the wall before sanding. By sanding the cement surface, you are doing it to remove all the loose sand gravels that may affect the painting results.

Sandpapers that we found in our market are commonly graded as coarse (40 to 60 grit), Medium (80 to 120), Fine (150 to 180), Very Fine (220 to 240), Extra Fine (280 to 320) and Super Fine (360 and above). Sanding with progressively finer grits removes the scratches left by the previous paper and eventually leaves a smooth finish. So greater the grit numbers, the finner the finish and look.

Pic-Internet

Cleaning after sanding is bet painters do not ignore. The most effective way to clean wood after sanding is to brush off all the dust and then wipe the surface with a rag and in some cases use mineral spirits. The mineral spirits clean any stain or grease off of the surface making it ready for painting. For the cement wall, use dry and wet rags in turn to clean. 

Masking in Painting

In today’s post, we bring to you the concept of MASKING in painting work. Not a prevalent practice in the Bhutanese painting market, the understanding of proper painting methods and their future implication are least considered but the cost is put first and fast. Keeping these entire aside, we hope this information help in one way or other at some point in time.    


Masking
Masking   Pic-Internet

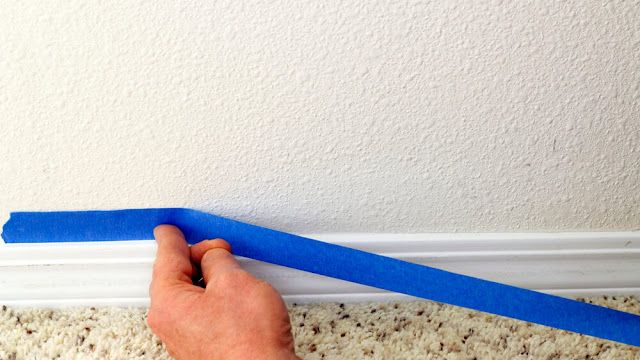
Well, masking in painting refers to a process where masking tape is covered on certain areas which are not intended for painting. Painting is a messy job; paint gets onto anything that’s not covered. So masking as a preparation before painting is a primary task that attributes to proper finishing, maintaining an accurate line of colours, and ease post painting like cleaning and minimising resource spending.

Though the masking benefits are abundantly but somehow inapplicable in our market, we have narrowed the understanding that is doable as follows;

1.     It takes far more time to clean up paint that ends up where it doesn’t belong than it takes to prevent the paint from getting there in the first place. Masking reduces clean up time. For ex. as in the picture, masking off windows with tape and plastic (used newspaper in our case) protects them from paint spatter. This saves time from scraping up paint dots on the glass.

  1. Proper masking speeds work. So long masking tape is done firmly, paint bleeding is a minor issue compared to trying to paint along with trim without getting spots of paint in the wrong place.
  2. Masking allows you to paint on correct alignment without worrying much about the opposite side. Only those who tried the art of perfection know how difficult that is to maintain proper paint lines without masking.
  3. Masking enables a painter to look like a pro. They need not have to master fantastic cutting-in skills. Using tape keep lines straight and the paint where it belongs.
  4. Masking help maintain visual appeal as it was. Covering door hinges & knobs and other hard-to-remove hardware with masking tape or small plastic retains its originality. It not only irks the property owner but is amateur of the painting firm painting door knobs and hinges.  
  5. Using drop cloths across the floor or wherever relevant as masking ensures that floor surfaces are protected from paint drips.

When masking is not taken care of, the post painting becomes laborious and cost implications are obvious. Masking is a critical part of the painting preparations and worth effort for many reasons. The techniques for masking are the same for indoors or out, cover properly parts that are not intended to paint. Bam then do the brush stroking, roll the rollers or spraying that we use.

Note: You can remove hardware that is easy to replace, keep them in a separate plastic bag and put it back. Paint shields can be an option in larger area masking scenarios. Remove the MASKING when the paint is sticky but not entirely dry.

Featured Post

Buli Tsho

I am sorry it won’t be sensible unless you understand Khengkha. I have requested the caretaker do in Dzongkha, but he felt Khengkha would be...